B.2.1 Initial provisioning
After connecting the device to mains power, it will boot with the Power LED on the front becoming steadily green. The LEDs on top flash green-yellow-blank to indicate that the device is unconfigured.
The Access Point defaults to being a DHCP server on a private subnet. For configuration access, simply connect a PC with a cross-over cable and make the PC a DHCP client. After connecting, the client will have an IP address in the 172.23.56.0/24 network. For configuration access, point your PC's browser to https://172.23.56.254
A wizard will ask you basic questions about your intended configuration which are non eduroam-specific. Please complete the wizard by answering all the questions. If you changed the IP address of the Access Point with the wizard, re-connect to the Access Point on its new address after finishing the wizard.
We will now continue to the setup of the crucial settings that are needed for a eduroam policy compliant eduroam Access Point.
B.2.2 NTP setup (confederation requirement: reliable timing source)
The Access point needs to be synchronised with a NTP or SNTP time server. There was an opportunity to set this up in the initial wizard, but let's verify if the settings are correct. Click on "Configuration" -> "Date & Time" -> "General". You should see the following menu:
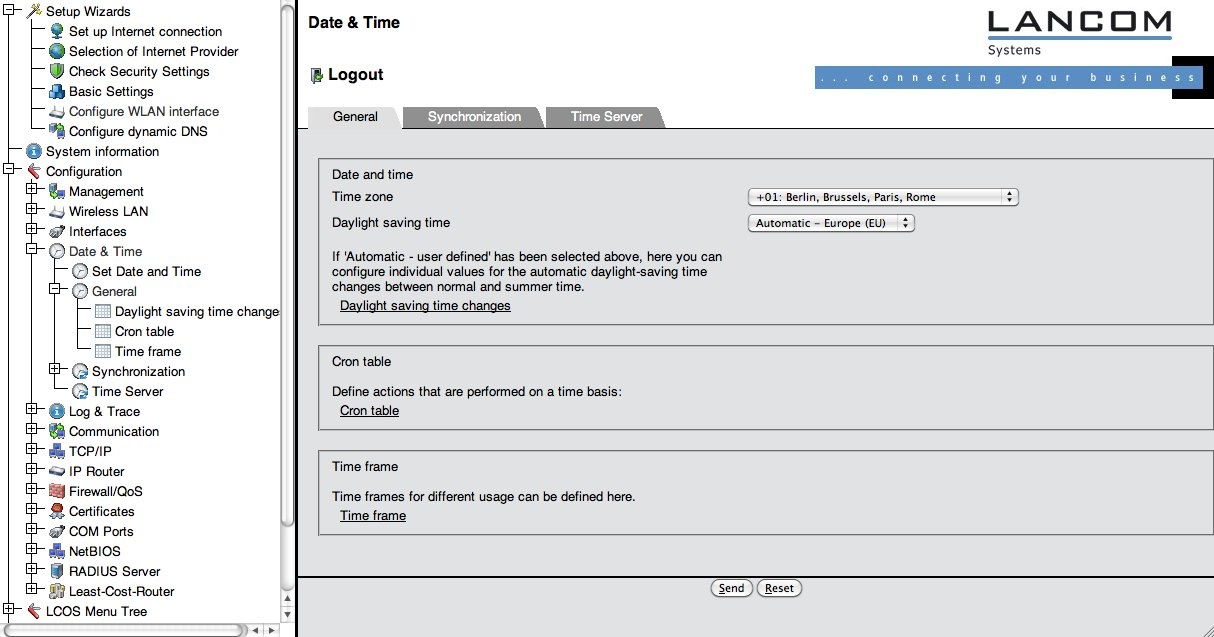
1. Verify that the correct time zone and dayight saving time settings are set.
2. Click on the "Synchronization" tab. You will see the following menu: 
- Verify that the radio button is set to "Synchronize to a time server ..."
- The wizard suggested the server "pool.ntp.org" as a time source. This is a sane default choice, but if you have your own time server, you may want to set up that one instead. If so,
- Click on the link Time Server (NOT the menu Time Server on the left-hand side). Add your own server(s) as appropriate.
B.2.3 Logging
1. Select Configuration>Log &Trace>Syslog and check the box Send information.
2. Click Syslog clients>add.
3. Add (minimum) localhost: IP 127.0.0.1, and activate all sources: 
The logs that are collected with the localhost setting will show up under
Expert Configuration>Status>TCP-IP>Syslog.
B.2.4 Configuring the SSID
1. Select Configuration>Wireless LAN>Logical WLAN setting – Network. 
2. Click on one of the available slots, then set the following options as described:
WLAN network enabled to On.
Network name (SSID) to eduroam.
Deselect the box labelled "Suppress SSID broadcast"
MAC filter enabled to Off.
Maximum count of clients to 0.
Client Bridge support to No. 
B.2.5 WPA Enterprise security
1. Configure the RADIUS server to use: Select Configuration – Wireless LAN – IEEE 802.1X – RADIUS
server.
2. Click on add and enter your server details: 
You must now apply the RADIUS server and encryption scheme to the SSID eduroam:
3. Select Configuration>Wireless LAN>802.11i/WEP.
4. Click on WPA or Private WEP setting – 80211.i/WEP.
5. Click on the slot in which you previously configured the SSID eduroam and enter the following settings:
Encryption Activated to Activated.
Method/Key 1 Length to 802.11i(WPA)-802.1x.
WPA Version to WPA1/2.
WPA1 Session Key Type to TKIP
○ WPA2 Session Key Type to AES
Other settings are irrelevant with WPA-Enterprise: 
B.2.6 RADIUS accounting server (optional)
If RADIUS accounting for the eduroam SSID shall be enabled, you must configure a RADIUS server to receive
the accounting messages:
- Select Expert Configuration>Setup – WLAN – RADIUS-Accounting and complete the server details:
- Afterwards, activate the actual RADIUS Accounting reporting under Expert Configuration>Setup –
Interfaces – WLAN – Network – RADIUS-Accounting
B.2.7 Using RadSec instead of RADIUS (optional)
LANCOM devices have a RadSec client built-in. It can be used instead of standard RADIUS for the uplink to an
IdP.
To use RadSec, you must have been given a eduroam Service Provider X.509 certificate from your NRO. First,
upload this certificate and the eduGAIN CA certificate (which can be downloaded athttp://sca.edugain.org/cacert/eduGAINCA.pem) via the device's "File Upload" menu: 
Then, go to Expert Configuration>Setup>IEEE802.1X>RADIUS Server and set the Protocol option to
RADSEC: 
The same option is also present in the RADIUS Accounting server menu that was discussed above. When
RadSec is to be used, we strongly suggest to use it for both authentication and accounting.