...
The 1st article presented you the hardware platform and the rationale behind the choices. Let's dive into the subject now now!
Requirement- Basic Linux/Unix knowledge
- Service provider networking knowledge
| |
...
- requirement #0: LTS operating system
- requirement #1: Benefit from LTS security patches
- requirement #2: Must be able to run dpdkDPDK
- requirement #3: (personal requirement) Must be familiar to me
- requirement #4: Able to run java Java software as freeRouter is written in Java
- requirement #5: small Small operating system software footprint
- requirement #6: Support for IPv4/IPv6
...
- Create a custom linux distribution using the Yocto project:
The objective is to have a tight control of the software installed on the appliance. This guarantee guarantees the smallest footprint we hope to obtain. For those familiar with OpenWRT, we can reach a tiny image size. My OpenWRT image is 5Mb.
- Use of NixOS or Nix package manager
This provide provides an incredible feature: commit/rollback functionality at the package management level level!
| Info |
|---|
|
The features above are still under study into RARE group. We will introduce these technologies once we feel more confident on how to integrate these technology technologies into a streamline streamlined deployment process. |
Article objective
...
| Expand |
|---|
| title | Operating system installation preparation |
|---|
|
| Code Block |
|---|
| language | bash |
|---|
| theme | Midnight |
|---|
| title | Get debian 10 minimal ISO |
|---|
| wget http://ftp.nl.debian.org/debian/dists/buster/main/installer-amd64/current/images/ |
| Info |
|---|
| title | On MACOSX, burn the iso using balenaEtcher |
|---|
| balenaEtcher can be downloaded here |
Via the appliance BIOS settings: - activate console port redirection:
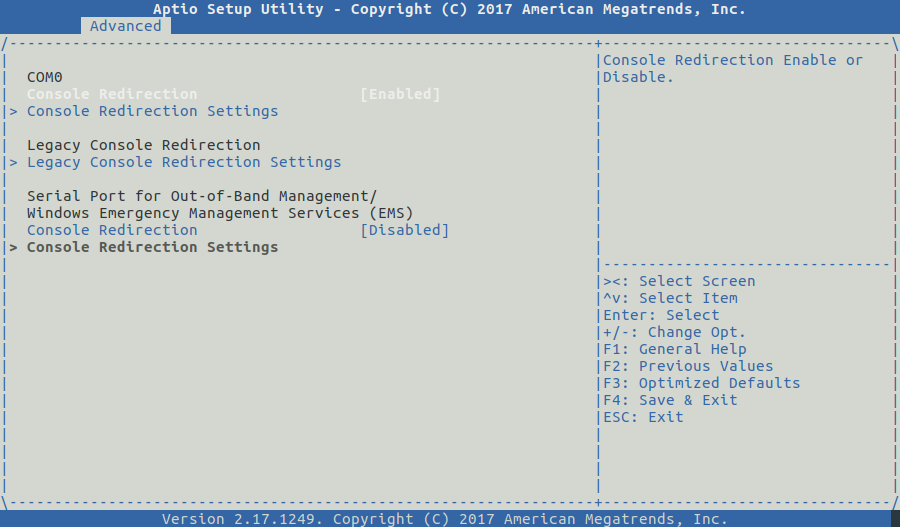
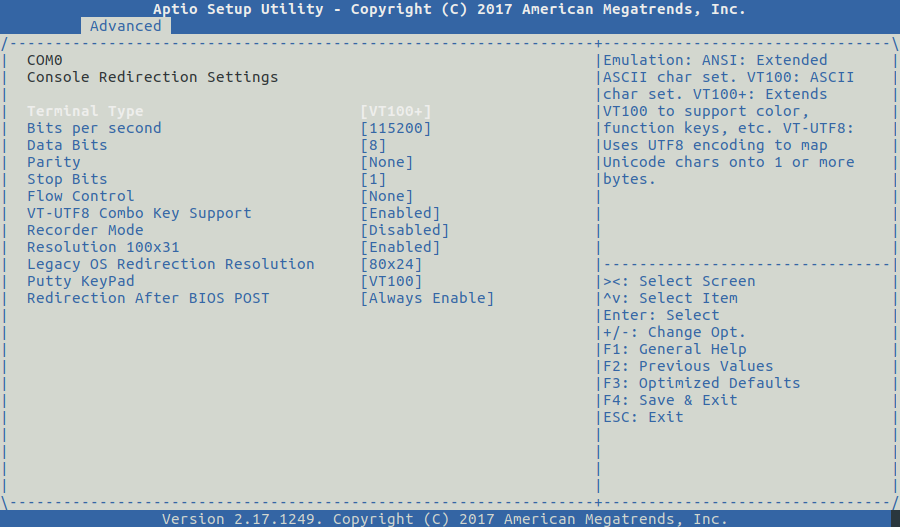
- configure serial port settings
Now that you have activated console port: - plug the USB key on which you previously burnt Debian 10
- make sure you set boot option from USB in BIOS settings
- reboot
You can now proceed to the next step: Debian 10 installation |
...
| Expand |
|---|
| title | Operating system installation |
|---|
|
We will assume that you have installed Debian 10 in on the 256 Gb SSD. Just as a side note during the installation process you'll be prompted the: "Software selection" window, in this steps we will: - unselect everything
- select "SSH server"

This will guarantee the tiniest Debian 10 operating system software footprint. We will on demand install the needed packages manually. |
...
| Expand |
|---|
| title | packages installation needed by RARE/freeRouter |
|---|
|
On minimal installation, sudo is not installed, so all the software will be done as root. | Code Block |
|---|
| language | bash |
|---|
| theme | Midnight |
|---|
| title | minimal Java installation |
|---|
| apt-get update
apt-get install default-jre-headless |
Latest The latest DPDK software is needed, we are using . We use the Debian 10 backport repository in orcer to get DPDK 19.11.2-1~bpo10+1 | Code Block |
|---|
| language | bash |
|---|
| theme | Midnight |
|---|
| title | dpdk from debian 10 backports repository |
|---|
| echo "deb http://deb.debian.org/debian buster-backports main" | tee /etc/apt/sources.list.d/buster-backports.list
apt-get update
apt-get install dpdk dpdk-dev |
| Code Block |
|---|
| language | bash |
|---|
| theme | Midnight |
|---|
| title | Check DPDK version |
|---|
| dpkg -l | grep dpdk
ii dpdk 19.11.2-1~bpo10+1 amd64 Data Plane Development Kit (runtime)
ii dpdk-dev 19.11.2-1~bpo10+1 amd64 Data Plane Development Kit (dev tools)
ii libdpdk-dev:amd64 19.11.2-1~bpo10+1 amd64 Data Plane Development Kit (basic development files) |
| Code Block |
|---|
| language | bash |
|---|
| theme | Midnight |
|---|
| title | additional 3rd party software used by freeRouter |
|---|
| apt-get update
apt-get install unzip net-tools libpcap-dev ethtool default-jre-headless psmisc tcpdump |
|
...
| Expand |
|---|
| title | Disable host networking (One time installation) |
|---|
|
As freeRouter is handling the networking task, we has have to disable the appliance networking. Forgetting to do so will result in conflicts and unpredictable behaviour. | Code Block |
|---|
| language | bash |
|---|
| theme | Midnight |
|---|
| title | Disable networking from systemd perspective |
|---|
| systemctl set-default multi-user.target
rm /usr/lib/systemd/network/*
SVC="network-manager NetworkManager ModemManager systemd-network-generator systemd-networkd systemd-networkd-wait-online systemd-resolved wpa_supplicant"
systemctl disable $SVC
systemctl mask $SVC |
|
...
| Expand |
|---|
| title | freeRouter systemd startup script |
|---|
|
| Code Block |
|---|
| language | bash |
|---|
| theme | Midnight |
|---|
| title | freeRouter systemd startup script |
|---|
| cat /lib/systemd/system/rtr.service
[Unit]
Description=router processes
Wants=network.target
After=network-pre.target
Before=network.target
[Service]
Type=forking
ExecStart=/rtr/hwdet-all.sh
[Install]
WantedBy=multi-user.target |
| Code Block |
|---|
| language | bash |
|---|
| theme | Midnight |
|---|
| title | /rtr/hwdet-all.sh script |
|---|
| cat /rtr/hwdet-all.sh
#!/bin/sh
cd /rtr
echo 1 > /proc/sys/net/ipv6/conf/all/disable_ipv6
echo 1 > /proc/sys/net/ipv6/conf/default/disable_ipv6
echo 0 > /proc/sys/net/ipv6/conf/lo/disable_ipv6
ip link set lo up mtu 65535
ip addr add 127.0.0.1/8 dev lo
ip addr add ::1/128 dev lo
# DPDK
echo 96 > /proc/sys/vm/nr_hugepages
modprobe uio_pci_generic

dpdk-devbind.py -b uio_pci_generic 01:00.0
dpdk-devbind.py -b uio_pci_generic 02:00.0
dpdk-devbind.py -b uio_pci_generic 05:00.0
dpdk-devbind.py -b uio_pci_generic 06:00.0
dpdk-devbind.py -b uio_pci_generic 07:00.0
dpdk-devbind.py -b uio_pci_generic 08:00.0
#VETH for CPU_PORT and OOBM_PORT
ip link add veth0a type veth peer name veth0b

ip link set veth0a multicast on
ip link set veth0a allmulti on
ip link set veth0a promisc on
ip link set veth0a mtu 8192
ip link set veth0a up

ip link set veth0b multicast on
ip link set veth0b allmulti on
ip link set veth0b promisc on
ip link set veth0b mtu 8192
ip link set veth0b up

ethtool -K veth0a rx off
ethtool -K veth0a tx off
ethtool -K veth0a sg off
ethtool -K veth0a tso off
ethtool -K veth0a ufo off
ethtool -K veth0a gso off
ethtool -K veth0a gro off
ethtool -K veth0a lro off
ethtool -K veth0a rxvlan off
ethtool -K veth0a txvlan off
ethtool -K veth0a ntuple off
ethtool -K veth0a rxhash off
ethtool --set-eee veth0a eee off

ethtool -K veth0b rx off
ethtool -K veth0b tx off
ethtool -K veth0b sg off
ethtool -K veth0b tso off
ethtool -K veth0b ufo off
ethtool -K veth0b gso off
ethtool -K veth0b gro off
ethtool -K veth0b lro off
ethtool -K veth0b rxvlan off
ethtool -K veth0b txvlan off
ethtool -K veth0b ntuple off
ethtool -K veth0b rxhash off
ethtool --set-eee veth0b eee off
ip link add veth1a type veth peer name veth1b

ip link set veth1a multicast on
ip link set veth1a allmulti on
ip link set veth1a promisc on
ip link set veth1a mtu 1500
ip link set veth1a up

ip link set veth1b multicast on
ip link set veth1b allmulti on
ip link set veth1b promisc on
ip link set veth1b mtu 8192
ip link set veth1b up

ip link set wlan0 up

ethtool -K veth1a rx off
ethtool -K veth1a tx off
ethtool -K veth1a sg off
ethtool -K veth1a tso off
ethtool -K veth1a ufo off
ethtool -K veth1a gso off
ethtool -K veth1a gro off
ethtool -K veth1a lro off
ethtool -K veth1a rxvlan off
ethtool -K veth1a txvlan off
ethtool -K veth1a ntuple off
ethtool -K veth1a rxhash off
ethtool --set-eee veth1a eee off

ethtool -K veth1b rx off
ethtool -K veth1b tx off
ethtool -K veth1b sg off
ethtool -K veth1b tso off
ethtool -K veth1b ufo off
ethtool -K veth1b gso off
ethtool -K veth1b gro off
ethtool -K veth1b lro off
ethtool -K veth1b rxvlan off
ethtool -K veth1b txvlan off
ethtool -K veth1b ntuple off
ethtool -K veth1b rxhash off
ethtool --set-eee veth1b eee off

ip addr flush dev veth1a
ip addr add 192.168.128.254/24 dev veth1a
#ADD DEFAULT ROUTE to OOBM SDN999
route add default gw 192.168.128.1
# START RTR !
start-stop-daemon -S -b -x /rtr/hwdet-main.sh |
| Code Block |
|---|
| language | bash |
|---|
| theme | Midnight |
|---|
| title | make hwdet-main.sh executable |
|---|
| chmod u+x /rtr/hwdet-main.sh |
| Warning |
|---|
| title | A bit of explanation |
|---|
|
| Code Block |
|---|
| language | bash |
|---|
| theme | Midnight |
|---|
| title | Disable IPv6 |
|---|
| echo 1 > /proc/sys/net/ipv6/conf/all/disable_ipv6
echo 1 > /proc/sys/net/ipv6/conf/default/disable_ipv6
echo 0 > /proc/sys/net/ipv6/conf/lo/disable_ipv6
ip link set lo up mtu 65535 |
Note that IPv6 operation would occur on the host it selfitself, IPv6 will be handle handled at freeRouter level | Code Block |
|---|
| language | bash |
|---|
| theme | Midnight |
|---|
| title | Disable IPv6 |
|---|
| echo 96 > /proc/sys/vm/nr_hugepages
modprobe uio_pci_generic
dpdk-devbind.py -b uio_pci_generic 01:00.0
dpdk-devbind.py -b uio_pci_generic 02:00.0
dpdk-devbind.py -b uio_pci_generic 05:00.0
dpdk-devbind.py -b uio_pci_generic 06:00.0
dpdk-devbind.py -b uio_pci_generic 07:00.0
dpdk-devbind.py -b uio_pci_generic 08:00.0 |
In the stanza above, we configure DPDK (required) In this case we use 96 hugepages, this value can be different if you are using a BOX box with different characteristic characteristics (# of ports, memory etc.) The objective is to configure a value that is not too high (waste of resources) and not too small. otherwise p4dpdk won't run. In this case this let leaves 10 Free HugePages. | Code Block |
|---|
| language | bash |
|---|
| theme | Midnight |
|---|
| title | HugesPages Verification |
|---|
| grep HugePages_ /proc/meminfo
HugePages_Total: 96
HugePages_Free: 10
HugePages_Rsvd: 0
HugePages_Surp: 0 |
- Activate UIO_PCI_GENERIC driver
- Bind the interfaces to DPDK, DPDK will controlled control them now. Keep in mind that now they will be invisible from the linux kernel.
This command use device PCI ID. In order to check device PCI ID just issue the below command: | Code Block |
|---|
| language | bash |
|---|
| theme | Midnight |
|---|
| title | List PCI device ID list ready to be use (or not by DPDK) |
|---|
| dpdk-devbind.py --status
Network devices using DPDK-compatible driver
============================================
0000:01:00.0 'I211 Gigabit Network Connection 1539' drv=uio_pci_generic unused=igb
0000:02:00.0 'I211 Gigabit Network Connection 1539' drv=uio_pci_generic unused=igb
0000:05:00.0 'I211 Gigabit Network Connection 1539' drv=uio_pci_generic unused=igb
0000:06:00.0 'I211 Gigabit Network Connection 1539' drv=uio_pci_generic unused=igb
0000:07:00.0 'I211 Gigabit Network Connection 1539' drv=uio_pci_generic unused=igb
0000:08:00.0 'I211 Gigabit Network Connection 1539' drv=uio_pci_generic unused=igb
Network devices using kernel driver
===================================
0000:09:00.0 'AR928X Wireless Network Adapter (PCI-Express) 002a' if=wlan0 drv=ath9k unused=uio_pci_generic
No 'Baseband' devices detected
==============================
Other Crypto devices
====================
0000:00:1a.0 'Atom Processor Z36xxx/Z37xxx Series Trusted Execution Engine 0f18' unused=uio_pci_generic
No 'Eventdev' devices detected
==============================
No 'Mempool' devices detected
=============================
No 'Compress' devices detected
==============================
No 'Misc (rawdev)' devices detected
=================================== |
- Configure the appliance OOBM via veth pair (as all physical port ports are handle handled by dpdk DPDK and will be invisible from the Linux kernel)
| Code Block |
|---|
| language | bash |
|---|
| theme | Midnight |
|---|
| title | Disable IPv6 |
|---|
| #VETH for CPU_PORT and OOBM_PORT
ip link add veth0a type veth peer name veth0b
ip link set veth0a multicast on
ip link set veth0a allmulti on
ip link set veth0a promisc on
ip link set veth0a mtu 8192
ip link set veth0a up
ip link set veth0b multicast on
ip link set veth0b allmulti on
ip link set veth0b promisc on
ip link set veth0b mtu 8192
ip link set veth0b up
ethtool -K veth0a rx off
ethtool -K veth0a tx off
ethtool -K veth0a sg off
ethtool -K veth0a tso off
ethtool -K veth0a ufo off
ethtool -K veth0a gso off
ethtool -K veth0a gro off
ethtool -K veth0a lro off
ethtool -K veth0a rxvlan off
ethtool -K veth0a txvlan off
ethtool -K veth0a ntuple off
ethtool -K veth0a rxhash off
ethtool --set-eee veth0a eee off
ethtool -K veth0b rx off
ethtool -K veth0b tx off
ethtool -K veth0b sg off
ethtool -K veth0b tso off
ethtool -K veth0b ufo off
ethtool -K veth0b gso off
ethtool -K veth0b gro off
ethtool -K veth0b lro off
ethtool -K veth0b rxvlan off
ethtool -K veth0b txvlan off
ethtool -K veth0b ntuple off
ethtool -K veth0b rxhash off
ethtool --set-eee veth0b eee off |
So the above section is pretty straightforward: - It creates veth0a / veth0b pair , for . For those familiar with P4, this is similar to the channel betwwen between the control plane (freeRouter) and p4dpdk (dataplane) using CPU_PORT
- It sets for veth0a/veth0b: multicast/allmulti/promisc flag + mtu=8192
- It disable disables TCP offload for veth0a/veth0b
We are doing do the same thing for the wireless network | Code Block |
|---|
| language | bash |
|---|
| theme | Midnight |
|---|
| title | veth1a/veth1b for Wireless network |
|---|
| ip link add veth1a type veth peer name veth1b
ip link set veth1a multicast on
ip link set veth1a allmulti on
ip link set veth1a promisc on
ip link set veth1a mtu 1500
ip link set veth1a up
ip link set veth1b multicast on
ip link set veth1b allmulti on
ip link set veth1b promisc on
ip link set veth1b mtu 8192
ip link set veth1b up
ip link set wlan0 up
ethtool -K veth1a rx off
ethtool -K veth1a tx off
ethtool -K veth1a sg off
ethtool -K veth1a tso off
ethtool -K veth1a ufo off
ethtool -K veth1a gso off
ethtool -K veth1a gro off
ethtool -K veth1a lro off
ethtool -K veth1a rxvlan off
ethtool -K veth1a txvlan off
ethtool -K veth1a ntuple off
ethtool -K veth1a rxhash off
ethtool --set-eee veth1a eee off
ethtool -K veth1b rx off
ethtool -K veth1b tx off
ethtool -K veth1b sg off
ethtool -K veth1b tso off
ethtool -K veth1b ufo off
ethtool -K veth1b gso off
ethtool -K veth1b gro off
ethtool -K veth1b lro off
ethtool -K veth1b rxvlan off
ethtool -K veth1b txvlan off
ethtool -K veth1b ntuple off
ethtool -K veth1b rxhash off
ethtool --set-eee veth1b eee off
ip addr flush dev veth1a
ip addr add 192.168.128.254/24 dev veth1a |
Add default default route to SDN999 for OOBM return traffic (192.168.128.1 is freeRouter sdn999: we will see the full config later) | Code Block |
|---|
| language | bash |
|---|
| theme | Midnight |
|---|
| title | #ADD DEFAULT ROUTE to OOBM SDN999 |
|---|
| route add default gw 192.168.128.1 |
|
Effectively start freeRouter main loop | Code Block |
|---|
| language | bash |
|---|
| theme | Midnight |
|---|
| title | Start freeRouter inside main loop |
|---|
| start-stop-daemon -S -b -x /rtr/hwdet-main.sh |
This main loop is triggered by the script hwdet-main.sh below: | Code Block |
|---|
| language | bash |
|---|
| theme | Midnight |
|---|
| title | /rtr/hwdet-all.sh script |
|---|
| cat /rtr/hwdet-main.sh
#!/bin/sh
while (true); do
cd /rtr/
stty raw < /dev/tty
java -Xmx4g -jar /rtr/rtr.jar router /rtr/rtr-
if [ $? -eq 4 ] ; then
  sync
  reboot -f
fi
stty cooked < /dev/tty
sleep 1
done
|
| Warning |
|---|
| title | A bit of explanation |
|---|
| Requirement considerations: - The box should run 24x7
- It must survive a power cut, i.e the service should be restored each time the power is cut for any reasons
- If no power cut but freeRouter has crashed for any reason, it should be restarted
Let me re-assure you, freeRouter usually don't crash, most often freeRouter has manual or better: auto-upgrades  | Code Block |
|---|
| language | bash |
|---|
| theme | Midnight |
|---|
| title | freeRouter infinite loop: freeRouter autoupgrade process restarts and self-restarts |
|---|
| while (true); do
...
done |
- The appliance has 8Gb RAM which is enough for JVM running freeRouter. (Full routing IPv4/IPv6 at the control plane is possible at home! ← ok this is useless but cool, no? :3 )
- RAM allocation is for for JVM and it's its tables
- Additional RAM allocation is for p4dpdk and p4emu, as we have to store also the table once for the native code too
- Lastly the kernel also needs also memory, so it's a good idea to leave some free ram RAM and not give everything to JVM.
| Code Block |
|---|
| language | bash |
|---|
| theme | Midnight |
|---|
| title | #ADD DEFAULT ROUTE to OOBM SDN999 |
|---|
| java -Xmx4g -jar /rtr/rtr.jar router /rtr/rtr- |
| Code Block |
|---|
| language | bash |
|---|
| theme | Midnight |
|---|
| title | #ADD DEFAULT ROUTE to OOBM SDN999 |
|---|
| if [ $? -eq 4 ] ; then
sync
reboot -f
fi |
|
|
...
| Expand |
|---|
| title | Design choice considerations |
|---|
|
All the choices have been made in order to make the appliance resilient as much as possible and provide an enjoyable user experience. We will see in a later article, a feature that I love: auto-upgrade. This will keep your appliance up to date over the network with the latest freeRouter train during low traffic period. Of course, for ISP P/PE core router we don't want this, but hey! why not? As soon as all customers are dual homed to 2 different PE PEs reachable via 2 direct core path paths, this can be achieve achieved during low traffic period after having set the metric to infinity on all the PE/P box boxes to be upgraded. (use IS-IS overload bit or OSPF max-metric router-lsa) |
...
In this article, we got our hand hands dirty and and manually installed manually freeRouter with DPDK dataplane from a clean slate environment. This is done on purpose, as I'd like you to understand the whole installation process in detailsdetail. There is an an automated installation alternative that will install freeRouter also. However this is will install freeRouter with software backend. If your hardware CPU+NIC is compatible you can just replace the software backend by DPDK backend. At that precise point we have a vanilla genuine installation of freeRouter with DPDK dataplane on an appliance that can survive physical wild environment and power cut. We have just now to create the 2 freeRouter configuration files:
...
| Tip |
|---|
| title | RARE validated design: [ SOHO #002 ] - key take-away |
|---|
|
- freeRouter installation is not complex. It just boils down in to installing a basic supported Linux OS, install JAVAJava, few some 3rd party software and the freeRouter jar and binaries itself
- In the binary list you'll have a special one call one called p4dpdk that corresponds to freeRouter DPDK dataplane that emulate RARE P4 program on BMv2 (It does not emulate BMv2 !)
- Though this installation is manual for pedagogic purpuse purpose, the installation can be fully automated, just fire up a VM with a bunch of interface interfaces and test it !
- The installation proposed is highly resilient and will ease upgarde upgrade of the appliance (we will see in subsequent article what it means
 ) )
In the next article, we will configure the freeRouter appliance, start the router, and provide provide configuration in order to have effective basic ping reachability . to the FTTH BROADBAND internal IP. |
...
