NROs
eduroam Managed SP uses the same institution management workflows that eduroam CAT and eduroam Managed IdP use, see A guide to eduroam CAT 2.0 and eduroam Managed IdP for National Roaming Operator administrators.
The URL to the pilot deployment is https://msp-pilot.eduroam.org .
You can invite organisations inside your NRO to the new eduroam Managed SP service just like in CAT and Managed IdP. In the usual invitation form, observe the new selection box which allows you to configure the type of participation: Service Provider:
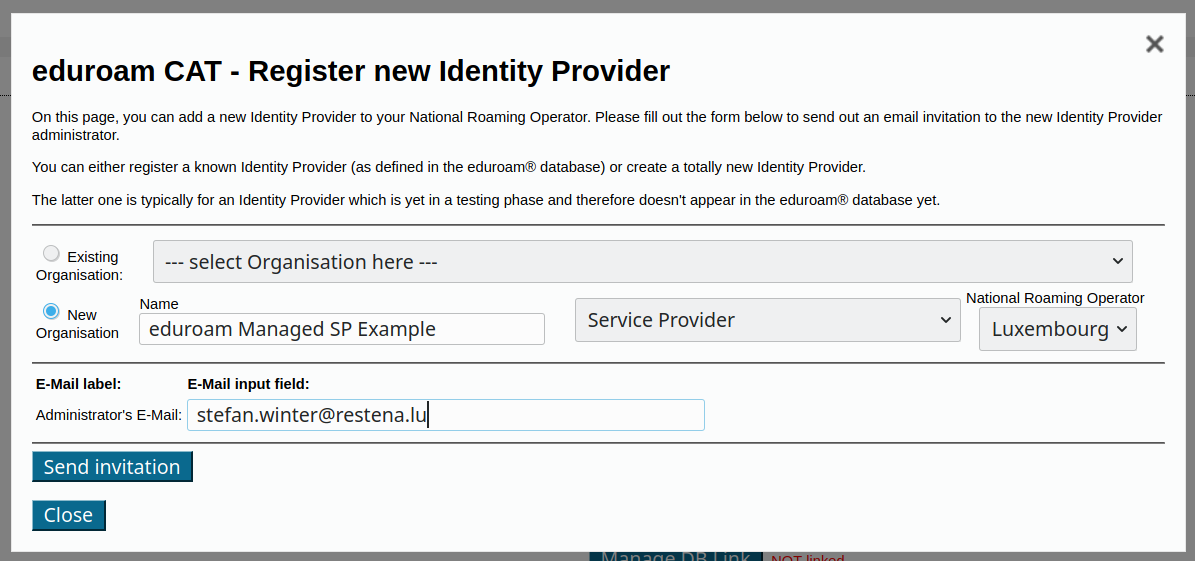
Choose 'Service Provider' only
Important during Pilot phase: Please only select "New Organisation" and only "Service Provider". (Rationale: it is expected that post-Pilot, Managed IdP and Managed SP will share the same deployment, making both options selectable. During the pilot however, the Managed IdP functionality is defunct and should not be used nor exposed to organisations.)
Do not enable "OpenRoaming: Allow organisation Opt-In"
Important during Pilot phase: the deployment has an NRO-level option to enable OpenRoaming: "OpenRoaming: Allow organisation Opt-In". This is a future feature which is not completely implemented. As an NRO admin, please do not enable this setting.
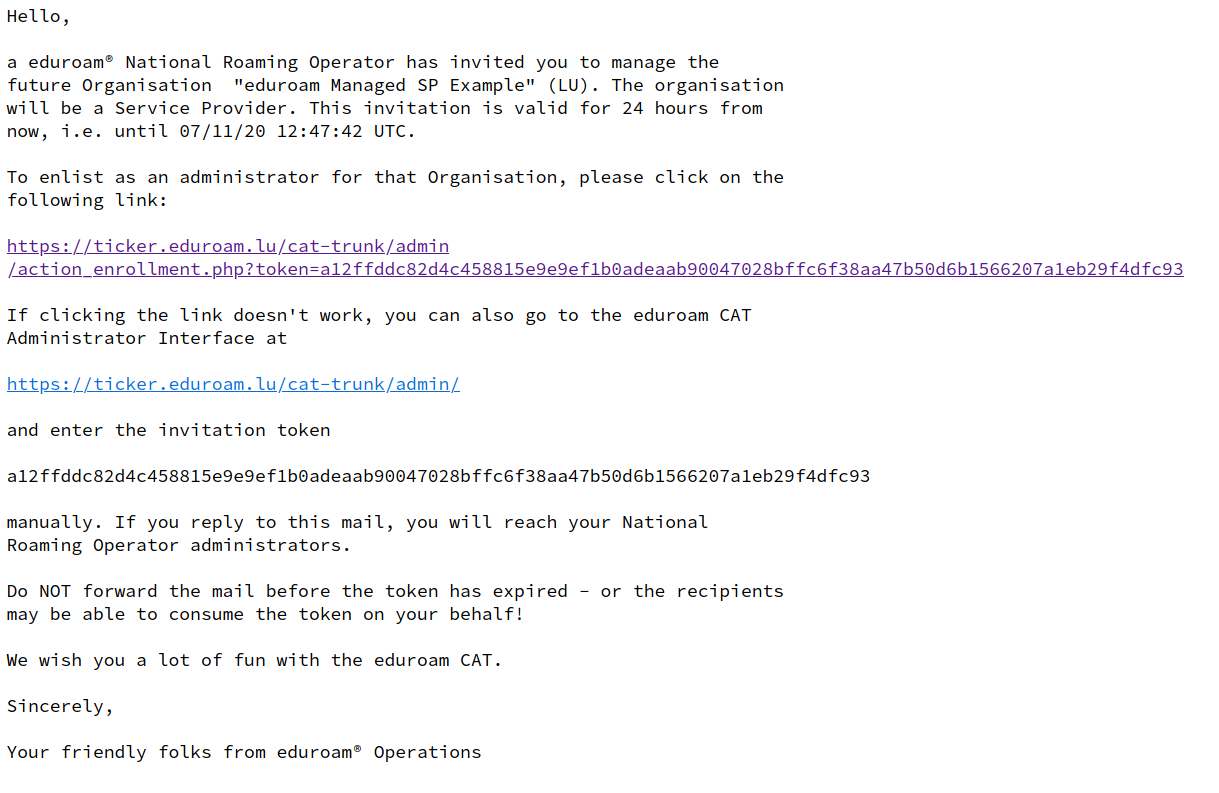
This is all you have to do. The organisation's administrator will now get the sign-up token by email and can start using eduroam Managed SP. For reference, the invitation mail looks like this (click to enlarge):
Organisations (eduroam SPs)
Sign-Up
You have received an invitation mail from your eduroam National Roaming Operator. Please follow the link in the invitation and log into the system with a federated or social identity of your choice. Afterwards, you will be presented with a screen allowing you to set basic parameters about your organisation (such as name, logo, approximate geographic location). Most of these fields are optional.
Remember to provide a helpdesk mail address!
Initial Configuration
At the end of this sign-up wizard, you are presented with your organisation overview in the system. This screen allows you to proceed to the eduroam Managed SP configuration details ("Manage SP functions"):
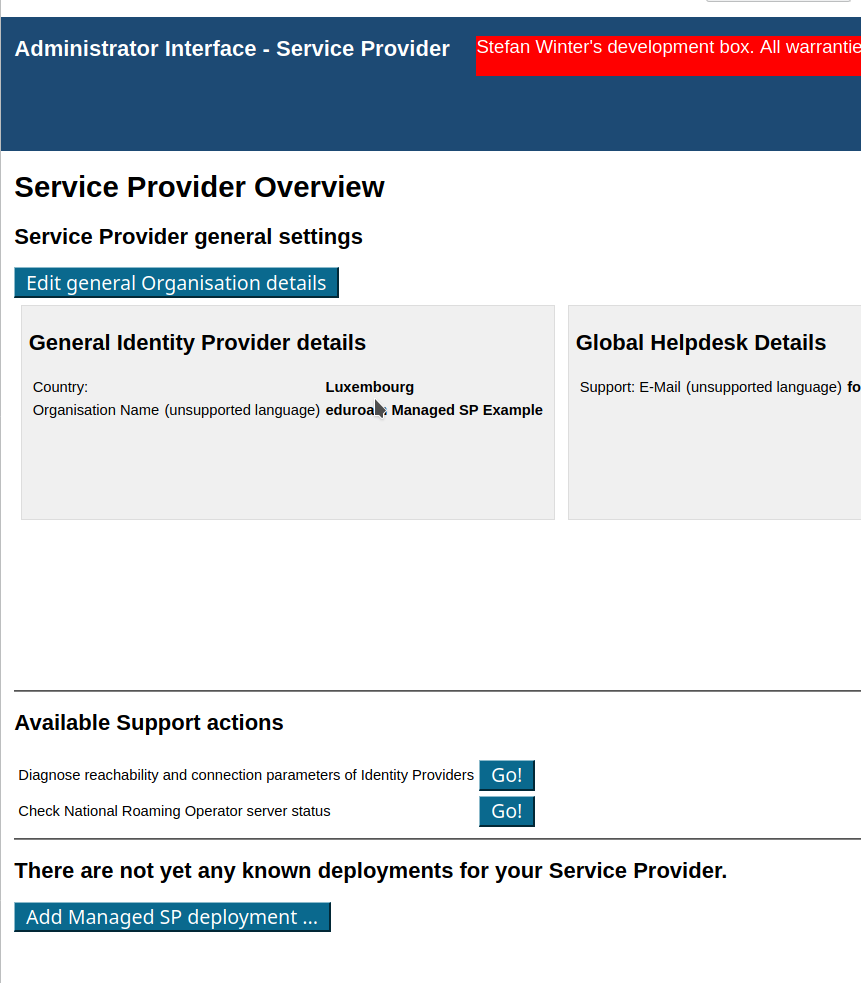
The button on the lower end will enlist you for eduroam Managed SP. You are immediately assigned two RADIUS servers to use (a primary = geographically closest to you, and a backup = runner-up to the closest).
You will first need to accept the Managed SP Terms of Use using the yellow button.

The configuration is then not yet active on our servers:
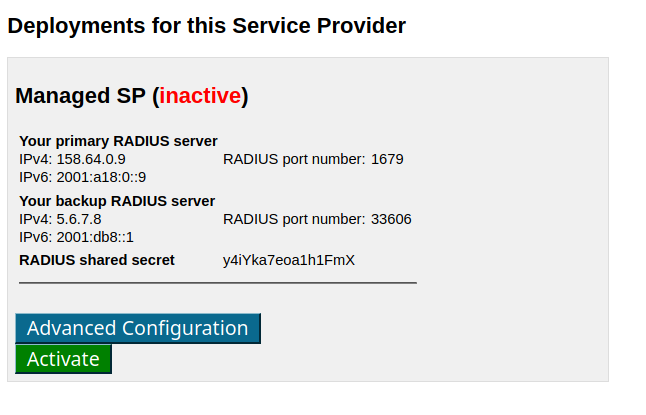
You can either activate the configuration immediately (this is probably the best option for all inexperienced administrators) or can choose to tweak some advanced configuration details first:
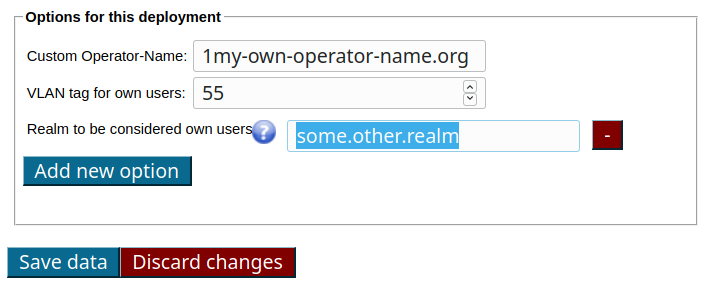
The three available options mean the following:
- Custom Operator-Name: the system will always inject a RADIUS Attribute called "Operator-Name" for authentication requests originating from your hotspots. They are auto-generated and do not look pretty. If you have a DNS domain and want requests to be attributed to that domain, you can instead configure that here. Note: the string has to mandatorily start with the ASCII character for a printed "1" and then afterwards your DNS domain, like in the example "1my-own-operator-name.org"
- VLAN tag for own users: If you wish, the system will assign authenticated users to a VLAN of your choice. It will only do so for users which are considered "your" users; roaming guests will not get a VLAN tag. If you happen to use also our eduroam Managed IdP offering, your IdP-side users are automatically considered "your" users. If not, or if you want to mark additional RADIUS realms as being your own, you need to use the third option.
- Realm to be considered own users: the realms listed here will receive the VLAN tagging tagging mentioned for the previous option. Note that you do not need to type your eduroam Managed IdP realm here; we attribute that realm to your eduroam Managed SP deployment automatically. You only need this option for own, custom, additional realms that should receive the "home" VLAN tagging. By using the "Add new option" button, you can add as many realms as you like.
Usage
Once you have activated your deployment with the green "Activate" button above, you are ready! In your local Wi-Fi equipment, find the WPA-Enterprise (RADIUS) configuration options. There, you enter any of the RADIUS IP addresses, the matching RADIUS port number, and the RADIUS shared secret, as indicated. The rest of the Wi-Fi configuration is standard eduroam, like SSID=eduroam, WPA2/AES. And then, go ahead and try it out - eduroam users are now able to use your Wi-Fi network.
Remember that the IP/port/secret details are only valid for your own deployment, and are meant to be kept private. Anyone with access to that data can pretend to be your Wi-Fi hotspot!